
This Week, It's About Time...
Tackling Timekeeping in RPGs
This week marks the 25th episode of my series of instructional videos about how to be a better gamemaster. In this week’s video, I tackle the topic of timekeeping in RPGs with a focus on Gygax’s recommendations for strict 1:1 time. (The muscle wizard in the thumbnail symbolizes the typical gamer who uses 1:1 time for their RPG campaigns in between gym sessions.)
Battle of the Backwoods
ACKS guru Helgeran has been running a Domains at War scenario that makes use of both D@W: Campaigns and D@W: Battles. Helgeran was kind enough to write up an overview of the recent Battle of the Backwoods, along with snapshots of the turn-by-turn progress of the battle. The remainder of this section is his session write-up.
Several armies have invaded depopulated Vlakia in search its Imperial Artifacts. The Dwarven Host lead by Vault-Reclamator Hurgon marches through the mountains to cut off the supply base of their nearest rival. Meanwhile, the Necromancers lead by Patriarch Ashur have the same idea. The dwarves have split their army earlier and with a catastrophic reconnaissance error have underestimated the size of the opposing force. The Necromancers’ reconnaissance wasn’t able to determine the exact location of the Dwarven Host, but guessed it correctly by dead reckoning. As the battle begins, the dwarves had not had any time to set up their anti-personnel siege weaponry.
Setup: The dwarves (top) set up to the right, aiming to use the narrow stream and dry riverbed as obstacles. The necromancers deploy on a wide front.

Turn 1: The slow dwarves charge to take up their positions before the undead can reach them. The undead advance, but their large numbers compared to their number of officers means their line is staggered.

Turn 2: The dwarves set their furies to guard the right side, not yet enraged so as to remain nimble in the face of missiles. The zombies are made to charge to make up for their slow speed. A stray volley from dwarven arbalests wounds the necromancer heavy cavalry.
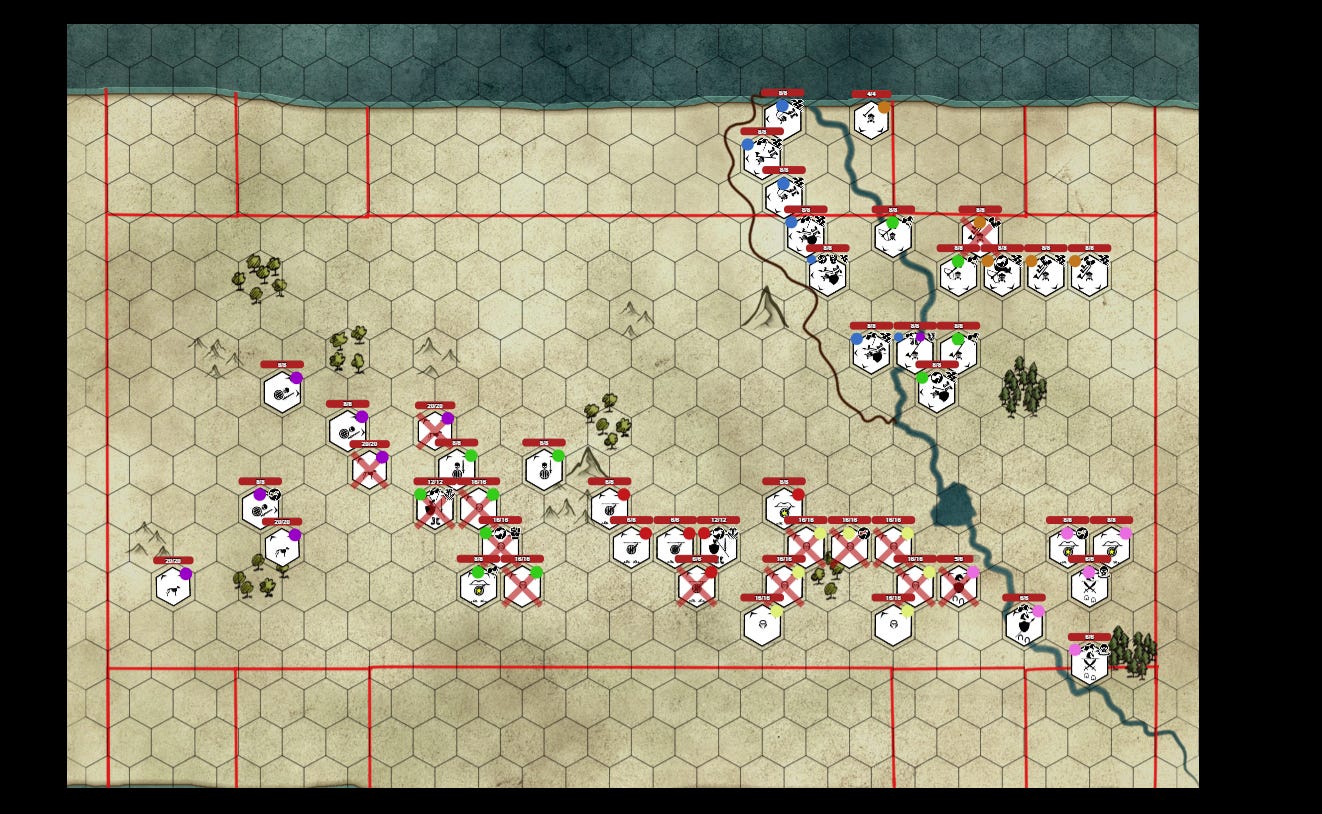
Turn 3: Dwarven missiles have trouble finding their targets. The fast skeletons and skeleton wardogs are starting to swing around to hug the dwarven line.

Turn 4: Minor wounds from missiles on both sides but discipline is maintained.

Turn 5: The zombies crash into the southern side of the dwarven line. The dwarven infantry was ready but despite their axes biting deep the zombies are unflinching and deliver devastating counter-blows.

Turn 6: The necromancer phalanx closes with the dwarven line but most of the spears are deflected by heavy armor. An inconclusive duel between the necromancer myrmidon and dwarven guardian leading the units. The dwarven furies are forced back by missile fire, their rage still kept at bay. The necromancer heavy cavalry charges a dwarven unit which routs off the field.

Turn 7: The dwarven furies finally unleash their rage. Charging the light cavalry they are interrupted by the readied heavy cavalry who would have devastated the lightly armored furies were it not for lucky intervention by their flesh-runes warding off the lances and hooves. The furies turn their axes on the heavy cavalry which is forced to flee, another unit of heavy cavalry charges but are also met by raging furies who cause them to rout. Skeletons and skeletal wardogs advance on the left side and despite fighting from the narrow stream wound the heavy infantry. Finally the Patriarch Ashur mounted on a gigantic zombie mastodon attacks the dwarven general directly – the mastodon inflicting maximum damage with a trampling attack exactly killing the general.
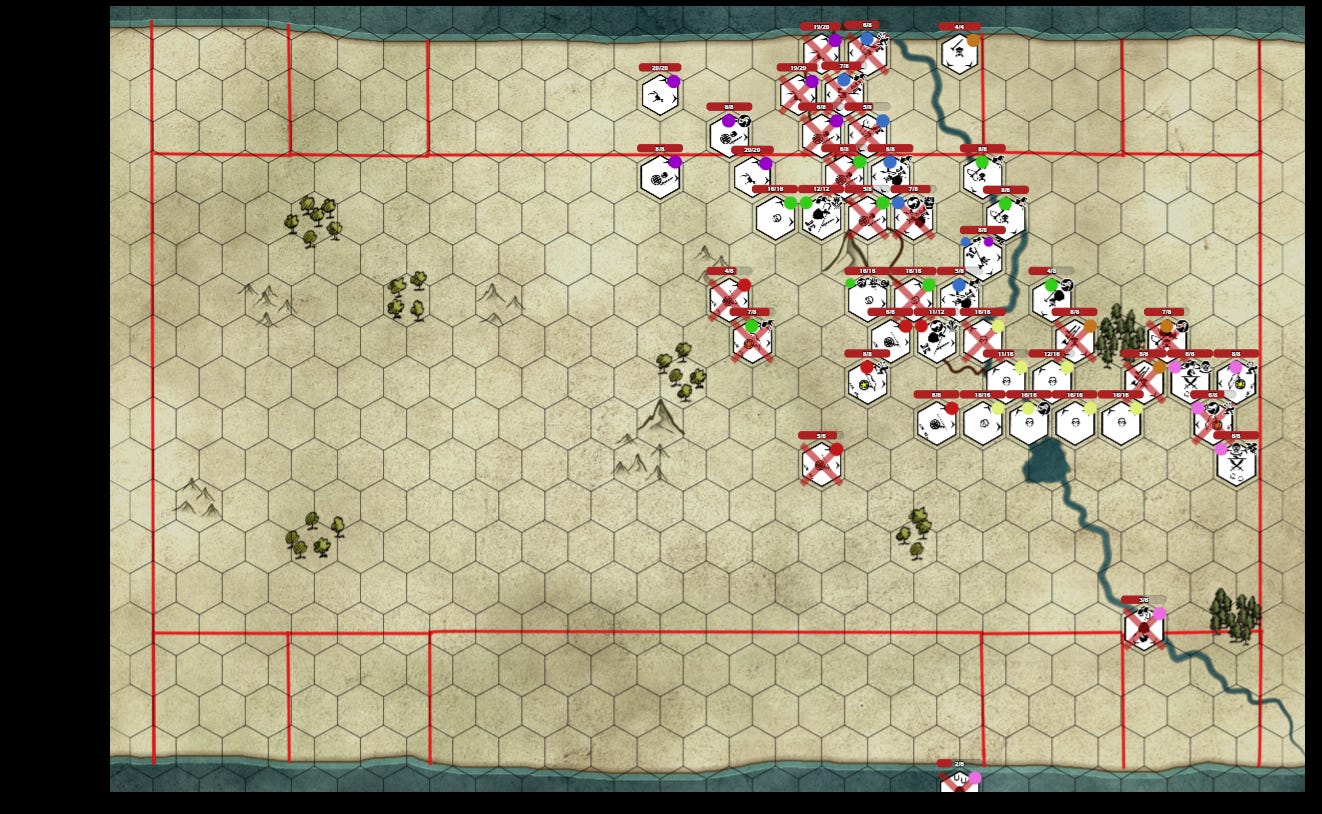
Aftermath: The dwarves contemplate making a stand to hurt their foes as much as possible but seeing their poor results so far decide to quit the field. Their leader is dead, trampled into the mire of his blood. Two dwarven units are destroyed by skeletal wardogs in the pursuit, but their muleriders block most of the undead host from pursuing them. The necromancers claim the spoils of the slain, including hundreds of corpses and some very unlucky prisoners, though they can't make use of the disassembled trebuchets as they lack siege engineers.
ACKS on Substack
If you haven’t checked out the flourishing ACKS Substack community, here’s some blogs to check out. We’ve added new ones to the list!


If you have a blog or third-party product that supports ACKS or Ascendant, please let me know and I’ll be happy to include you in my next round-up.
ACKS II Update
It seems likely that ACKS II will Kickstart in October. I regret the delay very much but “it is what it is.” Rome wasn’t built in a day.
This September, Adventurer-tier backers of my Patreon are getting an updated beta of the ACKS II Revised Rulebook, Conqueror-tier backers are getting an updated Judges Journal, and King-tier backers are getting an updated Monstrous Manual. If you’ve been wanting to check out how ACKS II is shaping up, you can head over to the Patreon now.
If you haven’t already, don’t forget to subscribe to the YouTube channel, then head over to the links below for others ways to get involved in my recently-declared Simulationist culture movement. If you’re already a fan, be kind and spread the word!
Autarch Discord with the smartest, nicest gamers around [fixed!]
Autarch Reddit with a sub-set of the aforementioned smartest, nicest gamers
Ascendant Patreon with a new character and story hook every month
Autarch Facebook page with news and updates about our projects
Autarch Twitter channel with brief comments and witty quirks
Ascendant Comics Facebook page with sneak previews of the upcoming comics
Ascendant Comics Instagram page with tons of art and cosplay
Ascendant Comics Twitter channel with short messages and quirky wit
Thanks for reading Arbiter of Worlds! Subscribe for free to receive new posts and support my work.
Should they insist on branding me as evil, I suppose it's only fitting that I aspire also to be necessary.
Seems my shame has been uncovered and the play report released. A lot of mistakes were made:
- I did not realize the craftpriest could turn and should have taken out the mammoth/caused damage to units from the start.
- there was a dearth of leadership forcing a fatal splitting of forces on campaign level, the companies split would not have made a difference but the leaders might have. Especially allowing priests to move freely. However I maintain the split was the only correct choice strategically with the information available.
- a misunderstanding of loose foot made me hold back my furies, I assumed enemy archers could simply withdraw so it would be no use to charge. Could have rolled them on turn3-4, perhaps the whole flank even.
- was too cautious in general. Should maybe have moved more aggressively to the east side of the stream and headed for bottom-right corner of map, making a shorter line on stream and allowing me to concentrate power more. Or left the green division one hex to the north to make a better line.
- the terrain was too sparse, a mistake was made in setup of it. Small was used as default size, not medium as the rules dictate. A larger forest or cliff might have helped a little. My goal was to cause casualties and go down with honor, I did not consider the battle actually winnable.
- The split was necessary because there was only one supply base and losing it means losing supply. This is almost instantly fatal. Having nomads who can move 7 six mile hexes a day with significant forces present on the map means not trying to protect supply is very high risk. Especially when most available troops have too little movement to respond quickly.
- And of course the worst mistake, rolling terribly on several important occasions.
The win for the enemy was absolutely deserved though. They did have more forces and other advantages but they played better too.